Storage
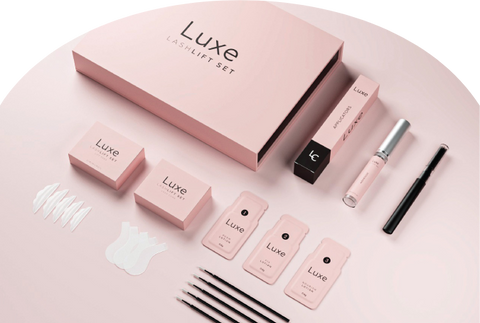
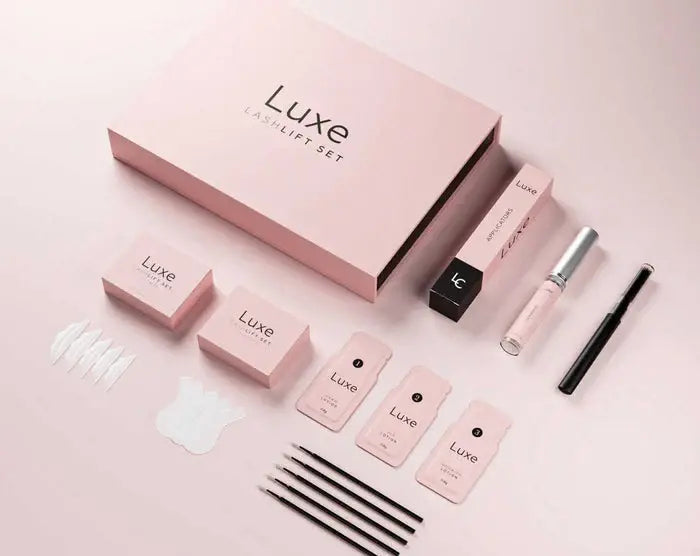
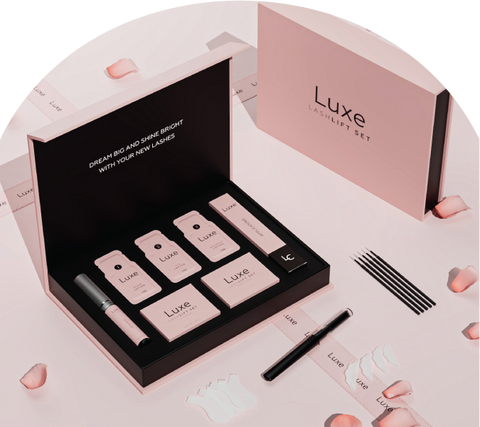
A Guide For Your Luxe Lashlift Set
Temperature
Light
Extra
Tips
Storage
Application
Keep in a cool, dry place
Room temperature
Keep away from sunlight
Good lighting recommended
Please ensure that all products are kept out of the reach of children.
TIP 1:Doing the application with a friend can make it easier and more enjoyable. Follow each step carefully and watch a tutorial video for guidance.
TIP 2:Don't rush through the process, take your time. If you have any questions, feel free to contact our support team for assistance.
TIP 3:Avoid using mascara, water, sauna, and steam for the first 24-48 hours after the lift. If using mascara afterwards, choose a non-waterproof formula.
How To Use
The Luxe Lashlift Set
STEP 1 – PREP
- Start by removing all make-up or residue before the treatment. You can achieve this by using our Luxe Cleanser, Luxe Lash Shampoo (both optional), or your regular oil free daily face wash.
- After cleansing, gently dry your lashes by patting them with a tissue. This step is important to ensure that the silicone pad stays in position during the treatment.
PRO TIP:We recommend using a baby shampoo as this has a PH of 5.5 or more, and it can open up hair flakes, making gluing much easier.

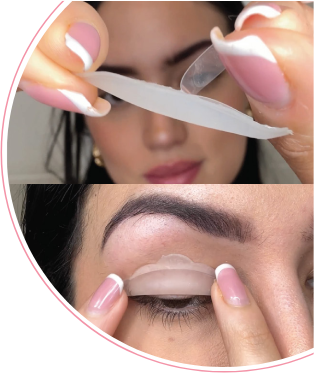
STEP 2 - APPLY THE SILICONE PAD
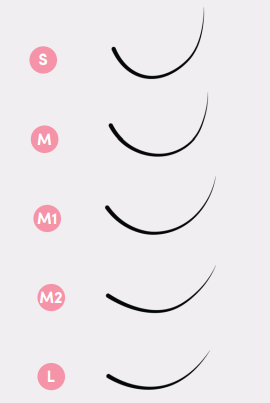
2A - HOW TO CHOOSE IT
- S – Dramatic (intense curl)
- M – Glamour (medium curl)
- M1 – Standard (slighter curl than with M)
- M2 – Slight (slighter curl than with M1)
- L – Natural (natural & soft curl)
PRO TIP:If you're not satisfied with the lash pad you chose, don't worry! You can always redo the application later on. We'll provide more information about this later in the process.
OPTIONAL TIP:Sometimes the lash pad can be too large: To resolve this, simply trim the outer edge of the lash pad to fit.
2B - HOW TO APPLY IT
- Remove the protective film from the back of the silicone pad.
- Stick the pad to your upper eyelid, just above the lash line, and press it down firmly for about 30 seconds to ensure it sticks perfectly.
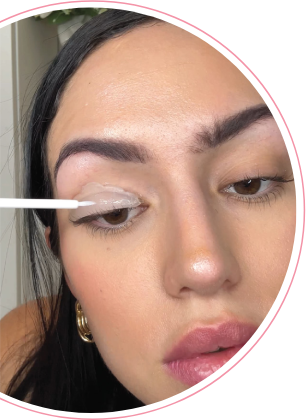
STEP 3 - APPLY THE GLUE TO FIX YOUR LASHES
3A - APPLYING GLUE TO THE PAD
- Now apply the lash glue to the top of the lash pads and wait 10–20 seconds for the glue to dry before pushing your lashes on the pad.
PRO TIP: Don't apply too much glue, as it can prevent the lotions from properly penetrating and absorbing into your lashes for an optimal lash lift.
NOTE:Glue pulls thin strings? Don't worry! Strings created by the glue are normal and help in pulling your lashes onto the pad :)
3B - FIXING YOUR
LASHES TO THE PAD
- Now set the lashes upwards until they stick. Be patient here, because the lashes will not stick right away.
PRO TIP:Check the lashes for symmetry, ensuring they are not bent and lie tightly against the silicone pad without any air gaps.
OPTIONAL TIPP:For stubborn lashes, use a bit more glue and hold them down for a longer time as the glue dries and sets. If any lashes are not sticking, apply a small amount of glue with a micro stick and press the lash tip for extra strength and hold.
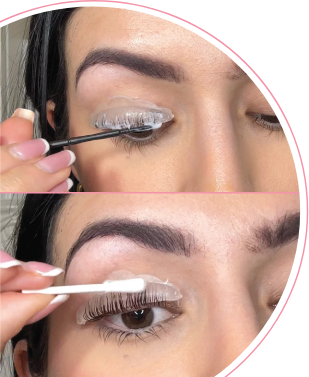
STEP 4 - APPLY PERM LOTION 1
4A - APPLY PERM LOTION 1
- Apply perm lotion 1 to the mid-section of your lashes for 12-15 minutes depending on lash thickness. Optional: Cover them with a cling film, but make sure to leave out the tip of the lashes, otherwise the tip of the lashes will curl.
- Remove with a dry cotton swab after processing.
PRO TIP:If you see any lotion on the lash tips, gently remove it with a cotton swab or stick.
OPTIONAL TIP: For downward and strong lashes: 14-15 minutes.
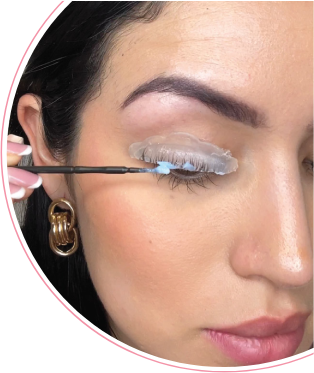
4B - APPLY
THE FIX LOTION 2
- Apply the fix lotion 2 to the middle section of your lashes. Cover them with cling film and leave it on for an additional 10-12 minutes (or 12 minutes for light and thin lashes).
- Remove with a dry cotton swab after processing.
PRO TIP:If you see any lotion on the lash tips, gently remove it with a cotton swab or stick.
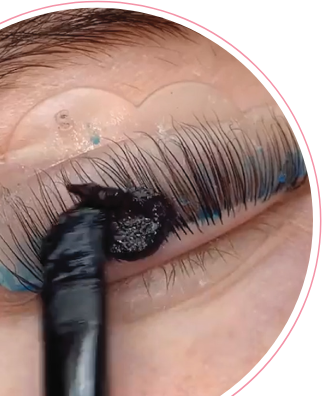
4C - TINTING
LASHES (OPTIONAL)
- Apply the mixed color to the lashes from the base to the tips and leave it on for 3 minutes. Then, remove the color thoroughly using a dry cotton swab.
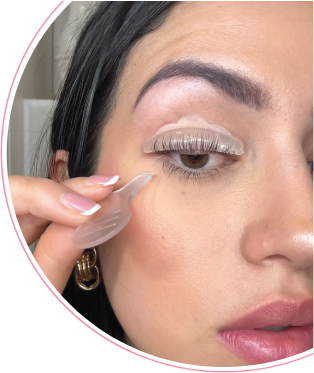
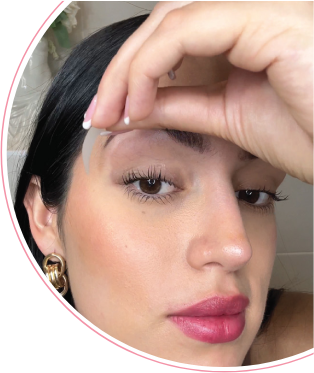
STEP 5 - FINAL TOUCHES
5A - REMOVE SILICONE PAD
- Use a damp cotton pad with a small amount of water or Luxe Cleanser to gently detach the lashes from the pad.
- Clean the eyelid with a moistened cotton pad to remove any glue residue. Carefully remove the lash pad from the eyelid.
- Comb your lashes with the eyelash brush. Done!
PRO TIP:Ensure thorough cleaning of the lashes to prevent curling after 2 days. Avoid leaving any color residue or glue on the lashes. Always brush the lashes upwards to avoid weakening the lift.
IMPORTANT: Avoid contact of your eyelashes with water, steam, hot baths, saunas, make-up, creams after the application for 24 hours.
5B - APPLY NOURISH LOTION 3
- Finally, apply the nourish lotion 3 with a cotton swab to revitalize your lashes. Then comb your lashes from the base to the tips.
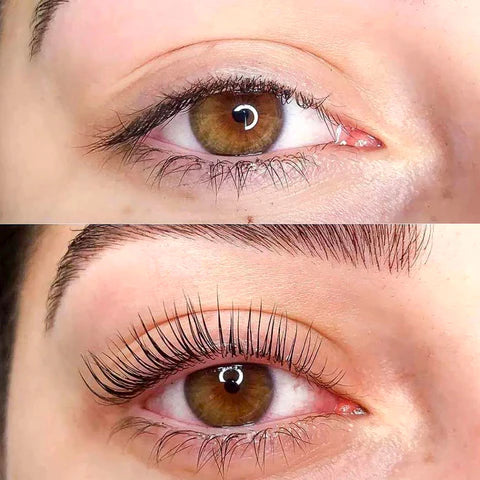
AND VOILÁ
Who's a lash queen?
You are!
Tipps & Tricks
Must do Luxe
Lashlift Aftercare
AVOID AFTER LIFTING
- Avoid contact of your eyelashes with water, steam, hot baths, saunas after the application for 24–48 hours.
- Avoid oils, shampoo and lotions for 24–48 hours.
- Avoid eye make up for 24 hours.
- Avoid rubbing or pulling your lashes for 24 hours.
PRO TIP
Try to sleep on your back for 24-48 hours! Since your lashes are still shape-shifting, sleeping on your side or putting pressure on your lashes can leave them misshaped.
WHAT WE RECOMMEND
- Use an oil-free mascara and an oil free makeup remover.
- After about two to three days following your Luxe Lashlift treatment, you can wear mascara.
- You can use normal mascara afterwards, but please avoid waterproof mascara and other aggressive products.
- To keep your lashes fluffy-looking and to prevent them from getting tangled, brush them daily.
PROBLEM: MY LASHES DIDN'T LIFT
Most people rush through the process, which is why their eyelashes do not lift properly. Your lashes may not have been lifted due to a few reasons:
SOLUTION:
- Clean your lashes thoroughly before the treatment to remove makeup residue and ensure they are free of oil.
- Follow the recommended processing time and be patient during the application.
- Ensure your lashes are tightly pulled upward against the pad without any gaps or air.
- After the treatment, avoid steam, water, and makeup for 24-48 hours to maintain the results.
PROBLEM: LASHES BECOME TOO CURLED AFTER A WHILE
During a lash lifting procedure, lashes may become too curled due to various reasons.
SOLUTION:
- Ensure you don't over-process the lashes by following the recommended processing time.
- Clean the lashes properly after each step to remove any lotion residues.
- Use the appropriate pad size and curvature to achieve the desired curl.
- Avoid lifting the tips and ends of the lashes excessively.
- If the lashes become too curled, you can gently straighten them by applying a small amount of lotion on two microbrushes. Place one brush on the top and the other from the bottom, then straighten the lashes. Repeat this process for a few lashes at a time, allowing the lotion to remain for 1-2 minutes. Remove the lotion with a dry cotton swab, not water. Give your lashes a rest for a few days before repeating the lifting process.
PROBLEM: LASHES ARE CROSSED AND CREASED
SOLUTION:
- Ensure proper placement of lashes on the pads during application.
- Separate the lashes well before applying the lotions to avoid overlapping.
- Take your time to position each lash individually and avoid clumping.
- Remember that lashes hold the shape they are placed in on the pad, so be careful during placement.
PROBLEM: THE CURL LOOKS UNEVEN
Your curl looks uneven? No problem, we got you!
SOLUTION:
- Ensure that the lotions are applied evenly to all lashes, avoiding any excess on specific lashes.
- Pay attention to the placement of the pads and ensure they are properly positioned and at consistent angles for each eye.
- Take care to apply the lotions uniformly across all lashes, ensuring they receive equal treatment.
- Double-check the positioning of the pads and adjust if necessary to achieve a more even curl.
- Pay attention to the application process and ensure consistency in the treatment of each lash to promote a uniform curl.
PROBLEM: I WANT TO RE-DO MY LASHES. HOW LONG SHOULD I WAIT?
- Lifts can be repeated as often as desired, but it is recommended to wait at least 2 weeks between treatments to prevent over-processing.
- If you want to freshen up your lift after a week or two, it is perfectly fine to do so.
Users Notice
- Please note before use: Despite multiple tested ingredients and no intolerance confirmed so far by our customers, please test the product for skin compatibility before use (test small amount on the back of the hand). Keep the eye closed during application and remove contact lenses.
- Lifts may be repeated as often as you want, but we recommend to wait at least 2 weeks to avoid over-processing. This means that if you want to freshen up your lift after a week or two, it’s absolutely fine!
- Incorrect application may cause irritation to the eye (avoid eye contact). If eye contact occurs, please rinse with water for 3–5 minutes and seek medical attention if necessary.
- Luxe Cosmetics is not responsible for any damages caused by this product or improper use. Keep away from children.
If you are still experiencing any issues, please feel free to DM us @Luxe or email us via info@luxe-cosmetics.com and one of our experts will help you out!