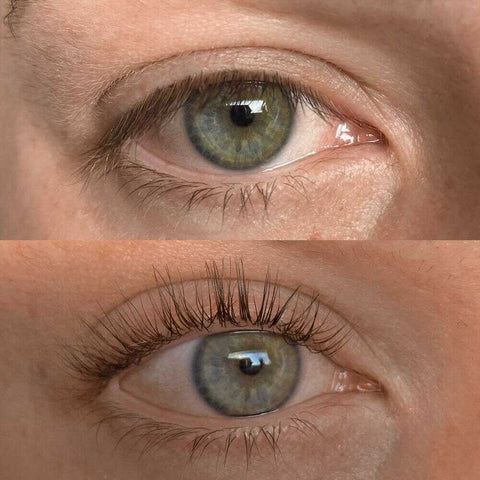
Do you also know these problems with a Luxe Lashlift Set?
Sometimes the eyelash lift works well and the eyelashes get a great curl and sometimes it doesn't work at all for some unknown reason.
The eyelashes look messy after the eyelash lift and the curl in the eyelashes is irregular.
After the treatment, the lashes are bent, you are upset and disappointed because you didn't get a great wow effect.
You can't explain why Luxe Lashlift Set sometimes works and sometimes doesn't, because you always perform the treatment in the same way. That's why you're frustrated and desperate and don't know what you're doing wrong.
How to avoid the most common eyelash lifting mistakes
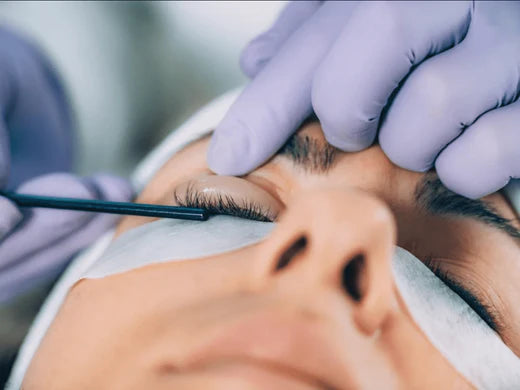
At first glance, eyelash lifting seems easy and quick to learn. After all, you just have to fix the lashes on the silicone pad, spread the lotions, tint the lashes and that's it. What else can go wrong? Nevertheless, it often happens that newcomers make mistakes when lifting eyelashes and the result in the end is not as beautiful as you would have liked. Then the eyelashes get no momentum, the curl becomes irregular or look messy after the eyelash lift. That's why we've compiled the 5 most common Luxe Lashlift Set mistakes for you. Here we explain to you what the consequences are and how you can avoid them in the future. So that you always conjure up a great eyelash lift for you and your friends or family.
Eyelash lift mistake number 1: The silicone pad sits too far on the inner corner of the eye
The silicone pad was not properly fitted to the eyelid and stuck too far to the inner corner of the eye. This leaves a few small lashes exposed at the inner corner.
The consequences are that a few lashes in the inner corner are not fixed and colored on the pad. As a result, these lashes simply stand out at the end and the result does not look nice. Especially if you are naturally blond and your eyelashes are also blond, it then looks as if you are missing a few eyelashes in the inner corner.
The solution: fit the silicone pad as close as possible to the inner corner of the eye, so that the small eyelashes are also fixed to the silicone pad in the inner corner. Also check if a few lashes are not hidden under the silicone pad and carefully bring them out with the eyelash tool or a microbrush.
Eyelash lift mistake number 2: The silicone pad is too far from the lash line
If you have glued the silicone pad too far away from the lash line, the lashes may sag when you remove the silicone pad. Then the curl in the lashes may not work in this case or the lashes may get an irregular curl.
The solution: It is very important that you stick the silicone pad as close as possible to the lash line and make sure that no air remains between the silicone pad and the lash line. The silicone pad should therefore be stuck as close as possible to the lash line.
Eyelash lift mistake number 3: The silicone pad is glued to the eyelashes
If you stick the silicone pad on the lashes, the lashes will get an unsightly crease at the end. Especially after a few weeks, when the lashes have grown a bit more, this unsightly crease will become even more noticeable.
The solution: Here, too, you should make sure that you stick the silicone pad as close as possible to the lash line and not on the lashes. To do this, pull the eyelid up a bit so you can see the lash line and place the silicone pad on the eyelid as close to the lash line as possible.
Eyelash lift mistake number 4: The eyelashes were not stretched well
Sometimes it can happen that there is air between the lashes and the silicone pad. Then the eyelashes are not properly tensioned. Either the curl in the lashes does not work, the lashes sag or have an irregular curl.
The solution: You can check for yourself whether you have tightened the eyelashes well by reaching between the eyelashes and the silicone pad with the eyelash tool. If you see that the lashes are loose and detach from the silicone pad, the lashes are not well tensioned on the silicone pad. Please always make sure that there is good tension in the lashes. The eyelashes must lie properly taut on the silicone pad. There must be no air between the lashes and the silicone pad.
Eyelash lift mistake number 5: The eyelashes are crossed on the silicone pad
If you haven't separated the lashes well on the silicone pad, they can cross over each other. Then they look jumbled at the end, sometimes have a crease and sometimes the tips can also be bent. The result then does not look nice.
The solution: make sure that the lashes are nicely even and glued side by side on the silicone pad. To correct crossed lashes, apply some glue to the lashes and correct them with the Eyelash Tool. In this way, the eyelashes lie neatly and side by side on the silicone pad at the end.


